| title | seoTitle | seoDescription | datePublished | cuid | slug | cover | tags |
|---|---|---|---|---|---|---|---|
Build a Secure Video App with SAWO and Twilio |
Build a Secure Video App with SAWO and Twilio |
This tutorial will show you how to develop a secure video app using SAWO authentication in a simple HTML & CSS app. |
Thu Apr 14 2022 11:41:09 GMT+0000 (Coordinated Universal Time) |
cl1yxkoct00rty6nv022w2a5e |
build-a-secure-video-app-with-sawo-and-twilio |
twilio |
This tutorial will show you how to develop a secure video app using SAWO authentication in a simple HTML & CSS app.
The source code for the App we're working on is available to view here.
SAWO is the only user-authentication tool that your developers would crave for. Their APIs are fast, reliable, integrate onto any platform, and speak many languages. It allows you to set up authentication in less than 10 minutes.
Twilio is a US cloud communication platform as a service (CPaaS) company. Twilio’s programmable application program interfaces (APIs) are a set of building blocks developers can use to build the exact customer experiences they want, such as :
- Making/receiving phone calls
- Sending/receiving text messages
- Launching email campaigns
- Staying connected with customers
Besides, Twilio also automates user verification and marketing campaign monitoring using its web service APIs and many more.
To get started, first create a new folder for the project and make it ready by running following commands.
mkdir greetnmeet
cd greetnmeet
Now let's setup twilio-cli in our desktop
npm install -g twilio-cli
twilio login
Since, we are making video app the proper tokens with necessary permissions are required for the user to get the app working. For that we need to create a new file funtions/get_token.js .
const twilio = require('twilio');

exports.handler = async function(context, event, callback) {
  const accessToken = new twilio.jwt.AccessToken(
    context.ACCOUNT_SID, context.API_KEY_SID, context.API_KEY_SECRET
  );
  accessToken.identity = event.username;
  console.log(event);
  const videoGrant = new twilio.jwt.AccessToken.VideoGrant({
    room: 'roomname',
  });
  accessToken.addGrant(videoGrant);
  return callback(null, {
    token: accessToken.toJwt(),
  });
}
Now we are ready to call this function in our frontend. So let's get ahead and file call assests/video.html to setup our video services.
<html>
  <head>
    <link rel="stylesheet" type="text/css" href="styles.css">
    <title>Greet n Meet</title>
  </head>
  <body>
    <div class="topnav">
      <a class="nav-link active" aria-current="page" href="#">Home</a>
    </div>

    <h1 align="center">Greet n Meet</h1>

    <form align="center">
      <input type="text" id="username"><br/>
      <button id="join_leave">Join call</button>
    </form>

    <div id="container" class="container">
      <div id="local" class="participant">
        <div></div>
        <div>You</div>
      </div>
      <!-- more participants will be added dynamically here -->
    </div>

    <p id="count" align="center"></p>

    <script src="https://sdk.twilio.com/js/video/releases/2.20.1/twilio-video.min.js"></script>
    <script src="app.js"></script>
  </body>
</html>
twilio-video.min.js is Twilio’s Programmable Video JavaScript SDK lets you add real time voice and video to your web applications. The JavaScript SDK connects to a Twilio Video Room and allows you to control the client-side video conference experience.
Now it's time to make our video.html responsive, let's make an app.js which we have called above under the script folder.
const usernameInput = document.getElementById('username');
const roomNameInput = document.getElementById("roomname");
const button = document.getElementById('join_leave');
const container = document.getElementById('container');
const count = document.getElementById('count');
let connected = false;
let room;

const addLocalVideo = async () => {
  const track = await Twilio.Video.createLocalVideoTrack();
  const video = document.getElementById('local').firstElementChild;
  video.appendChild(track.attach());
};

const connectButtonHandler = async (event) => {
  event.preventDefault();
  if (!connected) {
    const username = usernameInput.value;
    if (!username) {
      alert('Enter your name before connecting');
      return;
    }
    button.disabled = true;
    button.innerHTML = 'Connecting...';
    try {
      await connect(username);
      button.innerHTML = 'Leave call';
      button.disabled = false;
    }
    catch {
      alert('Connection failed. Is the backend running?');
      button.innerHTML = 'Join call';
      button.disabled = false;
    }
  }
  else {
    disconnect();
    button.innerHTML = 'Join call';
    connected = false;
  }
};
Let's call our get_token endpoint we created earlier to grant the token to the user accessing our app, and use it to connect with other on the same stream. Also let's setup other functionality such as disconnect and participants too.
const connect = async (username) => {
  const response = await fetch('/get_token', {
    method: 'POST',
    headers: {'Content-Type': 'application/json'},
    body: JSON.stringify({'username':username}),
  });

  const data = await response.json();
  room = await Twilio.Video.connect(data.token);
  room.participants.forEach(participantConnected);
  room.on('participantConnected', participantConnected);
  room.on('participantDisconnected', participantDisconnected);
  connected = true;
  usernameInput.style.display = 'none';
  updateParticipantCount();
};

const updateParticipantCount = () => {
  if (!connected) {
    count.innerHTML = 'Disconnected.';
  }
  else {
    count.innerHTML = (room.participants.size + 1) + ' participants online.';
  }
};

const participantConnected = (participant) => {
  const participantDiv = document.createElement('div');
  participantDiv.setAttribute('id', participant.sid);
  participantDiv.setAttribute('class', 'participant');

  const tracksDiv = document.createElement('div');
  participantDiv.appendChild(tracksDiv);

  const labelDiv = document.createElement('div');
  labelDiv.innerHTML = participant.identity;
  participantDiv.appendChild(labelDiv);

  container.appendChild(participantDiv);

  participant.tracks.forEach(publication => {
    if (publication.isSubscribed) {
      trackSubscribed(tracksDiv, publication.track);
    }
  });
  participant.on('trackSubscribed', track => trackSubscribed(tracksDiv, track));
  participant.on('trackUnsubscribed', trackUnsubscribed);
  updateParticipantCount();
};

const participantDisconnected = (participant) => {
  document.getElementById(participant.sid).remove();
  updateParticipantCount();
};

const trackSubscribed = (div, track) => {
  div.appendChild(track.attach());
};

const trackUnsubscribed = (track) => {
  track.detach().forEach(element => element.remove());
};

const disconnect = () => {
  room.disconnect();
  while (container.lastChild.id != 'local') {
      container.removeChild(container.lastChild);
  }
  button.innerHTML = 'Join call';
  usernameInput.style.display = 'inline-block';
  connected = false;
  updateParticipantCount();
};

addLocalVideo();
button.addEventListener('click', connectButtonHandler);
We are done with setting up with our video webapp. Wait..! Something is not right. If we leave our app as it is, then anyone will be able to access it directly and might intrude in the conversation. To prevent such intrusion and also to secure our app, let's put up the SAWO authentication.
First let's get our credentials, by signing in to SAWO Labs Dashboard
Select Create New project and then choose Web -> </>Code
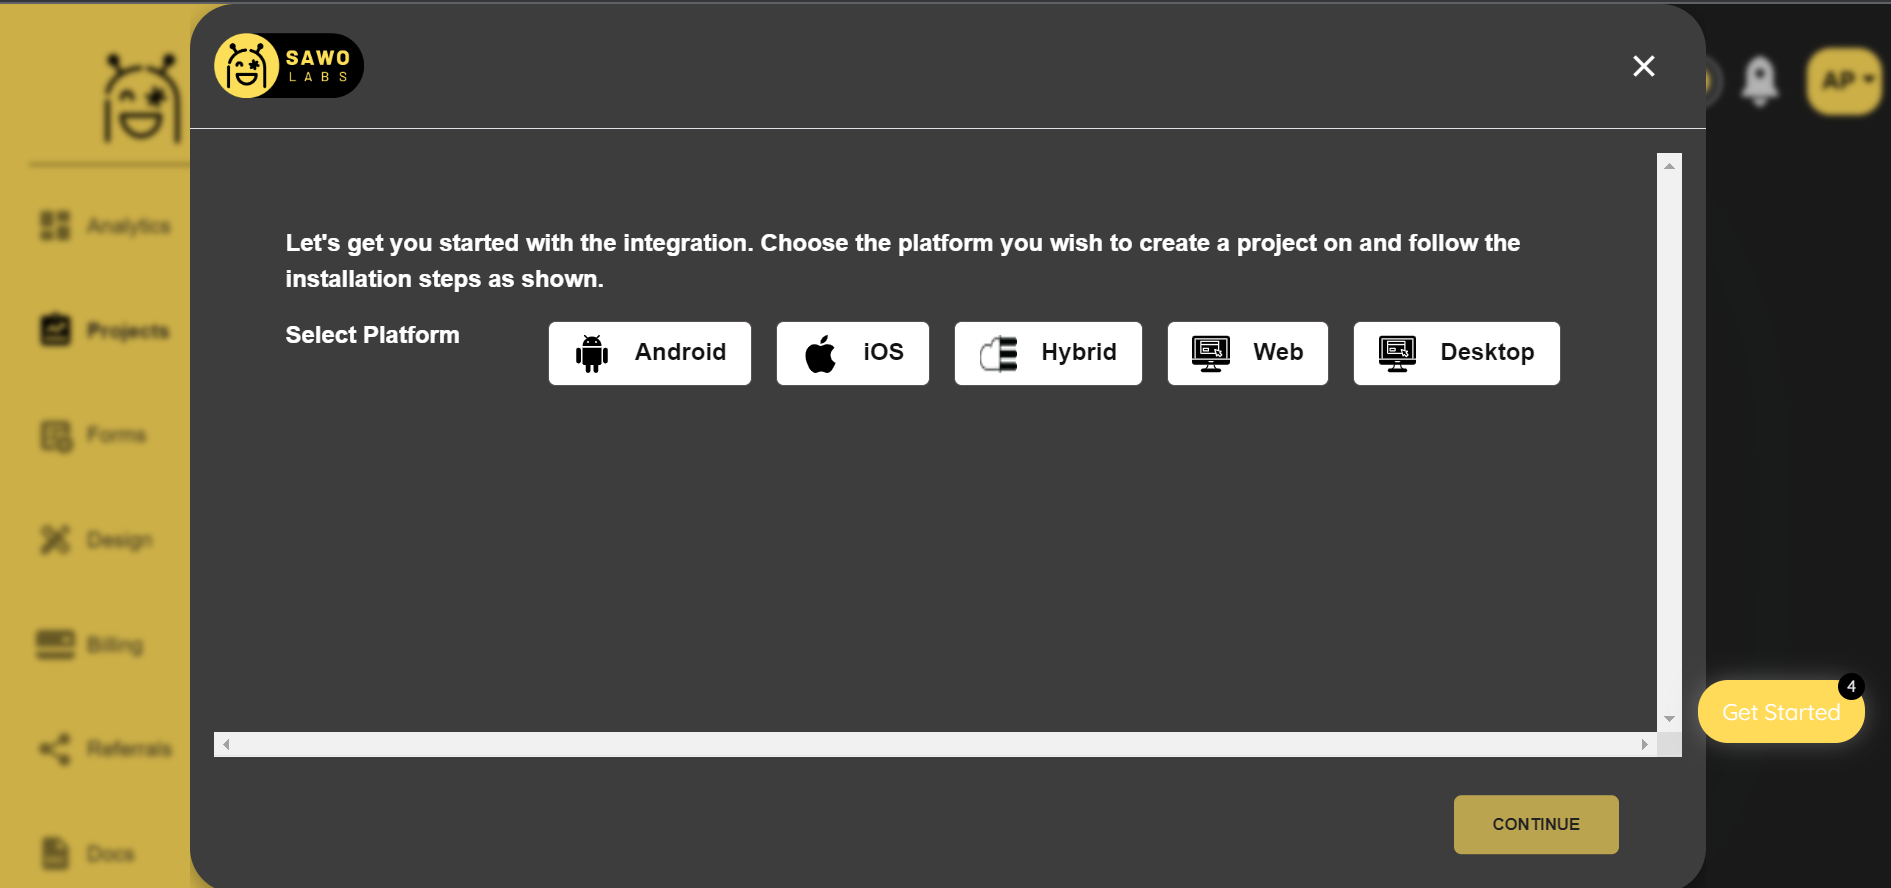
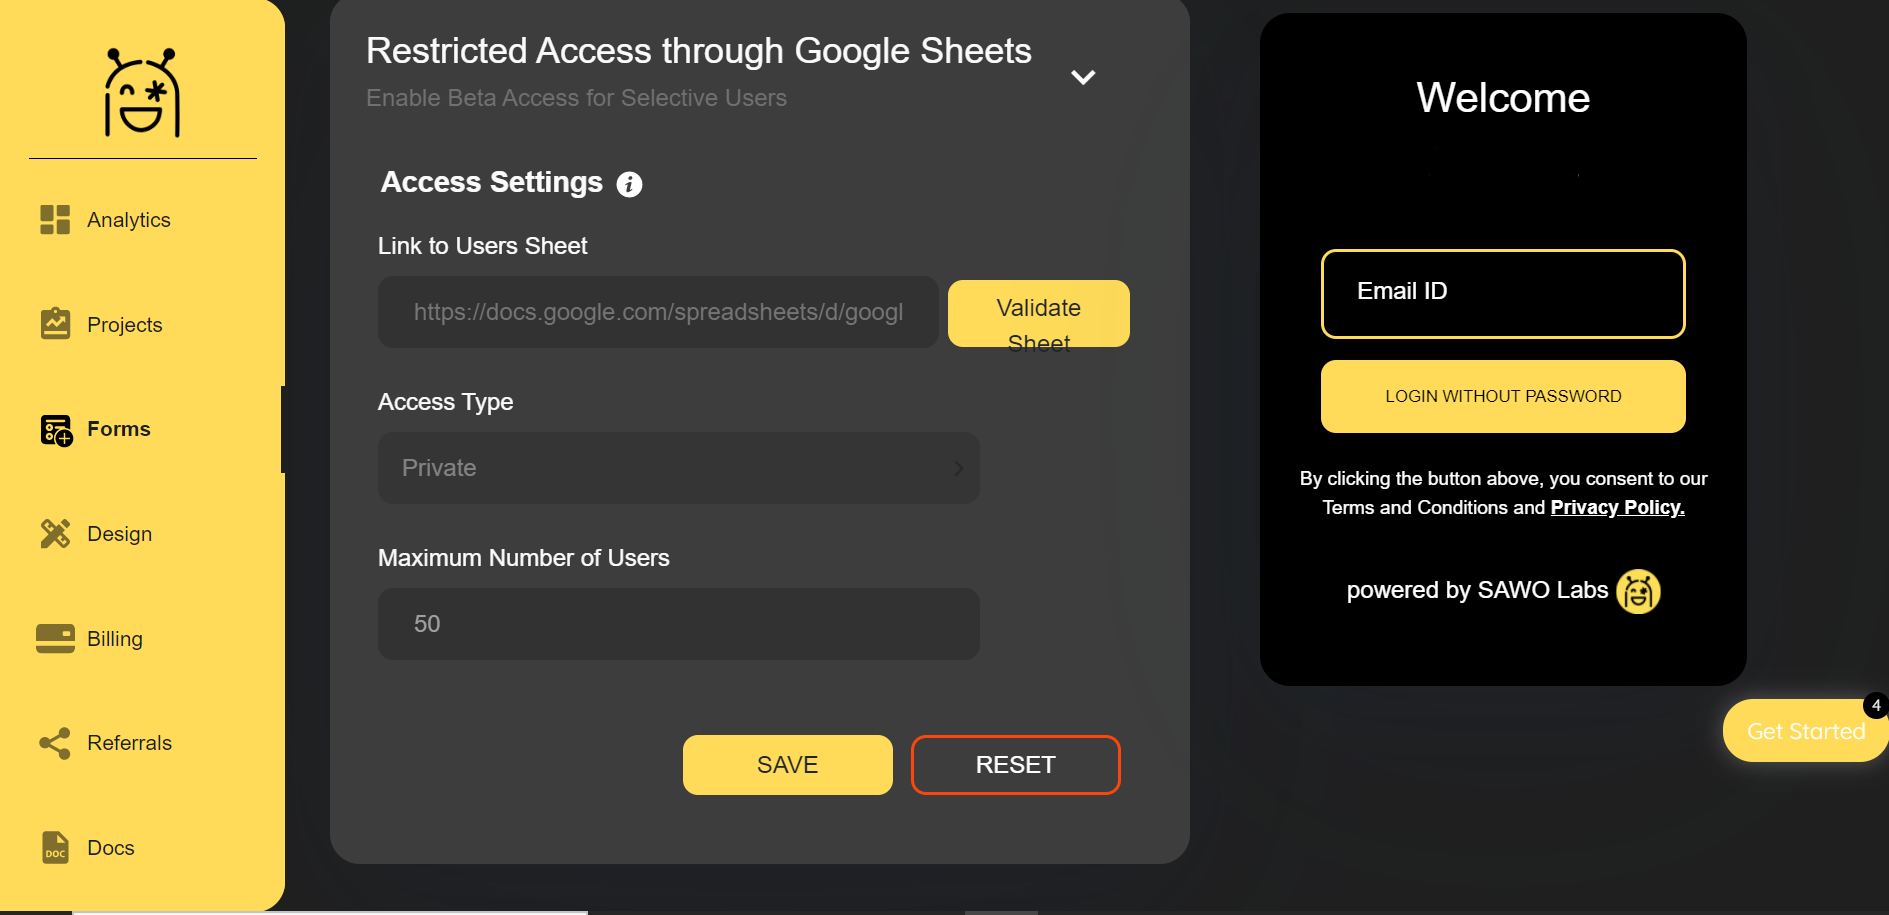
Save your API Key and for now let's keep our hostname url as localhost. Go to the form section and let's add our google spreadsheet with the email of people we want our app to used by.
This SAWO feature allow us to prevent other from entering in directly and at same allows people we want to meet directly. Now it's time to setup our login in index.html in same folder as video.html.
<html lang="en">
  <head>
    <meta charset="UTF-8" />
    <meta name="viewport" content="width=device-width, initial-scale=1.0" />
    <title>Greet n Meet</title>
  </head>
  <body>
    <div class="topnav">
      <a class="nav-link active" aria-current="page" href="#">Home</a>
      <a class="nav-link" href="/radio.html" target="_blank">Radio</a>
    </div>
    <div class="container">
      <div class="login-container">
        <h1 align="center">Greet n Meet</h1>
        <div id="sawo-container" style="height: 400px; width: 300px" align:"center"></div>
      </div>
    </div>
    <script src="https://websdk.sawolabs.com/sawo.min.js"></script>
    <script>
      const payload = sessionStorage.getItem("payload");
      if (payload) {
        window.location.href = "/video.html";
      }
      var config = {
        containerID: "sawo-container",
        identifierType: "email",
        apiKey: "APIKEY", // create in our SAWO Dashboard
        onSuccess: (payload) => {
          sessionStorage.setItem("payload", JSON.stringify(payload));
            window.location.href = "/video.html";
        },
      };
      var sawo = new Sawo(config);
      sawo.showForm();
    </script>
  </body>
</html>
Now our authentication is ready, but wait even now by url bypassing anyone might enter in our stream, for that let's create a script in our video.htmlthat let's the access to the video stream by verifying the payload content.
    <script>
      const payload = sessionStorage.getItem("payload");
      if (payload) {
        // If the payload is available then console.log the payload
        console.log("Payload : " + payload);
      } else {
        // If the payload isn't available, that means the user hasn't logged in yet.
        // So redirecting back to authentication
        window.location.href = "/index.html";
      }
    </script>
</body>
Finally our app is completed and ready to deploy on twilio' severless platform
twilio plugins:install @twilio-labs/plugin-serverless

twilio serverless:deploy