Running every Intel-based macOS releases (from Mac OS X Tiger 10.4 to macOS Sonoma 14) on HP ProDesk 400 G1 (Haswell)
OpenCore-based EFI for HP ProDesk 400 G1 (Haswell)

Status: Fully Working | Stable


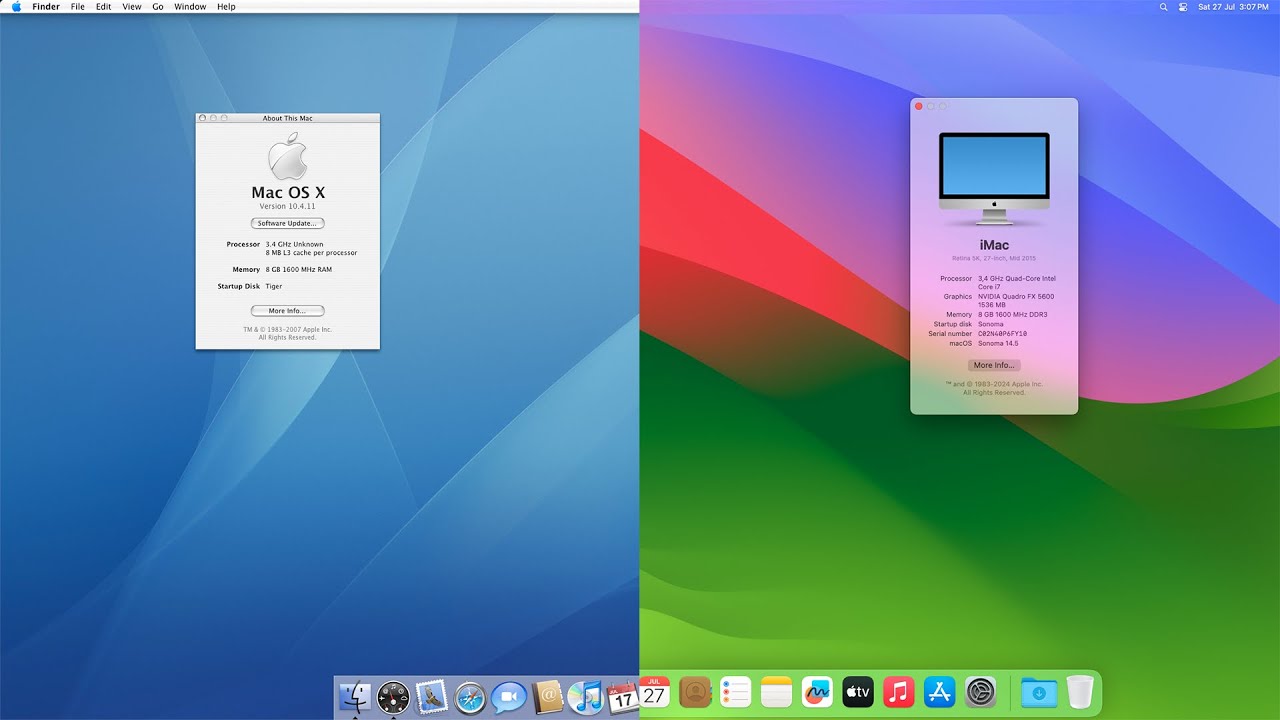
I was inspired to create this project when I prepared macOS installers (from Mac OS X Tiger 10.4 to macOS Sonoma 14) in an external hard drive and wanted to test these installers to see if they worked properly. I tried recent versions of macOS on my daily hackintosh HP Z640, but it only supports OS X El Capitan 10.11 and above. I had an older machine (Core 2 Quad Kentsfield) but only managed to get as far as OS X Mountain Lion. I still wanted to test old Mac OS X (Tiger-Lion), and then I found this repo about running all Intel-based macOS releases on a single computer, it motivated me to do the same thing because I thought of another computer I have, HP ProDesk 400 G1 (Haswell). From here on the real fun starts, I needed to build a hackintosh capable of running all Intel-based macOS versions from Mac OS X Tiger 10.4.10 to macOS Sonoma 14.5 with ONE EFI folder allowing all Intel versions of macOS to be run on the same computer.
This hackintosh is one of the most powerful Mac OS X Tiger computers, since version 10.4.4 was released in 2006 (initial Intel release) way before this hardware (2013). I've noticed that Mac OS X versions 10.6 and earlier are very snappy and responsive, and I miss the feel of the old Mac OS X and the Aqua theme.
This project was created from scratch using the Dortania guide specifically for the HP ProDesk 400 G1.
DISCLAIMER: As you embark on your Hackintosh journey you are encouraged to READ the entire README and Dortania guides before you start.
This HP ProDesk 400 G1 Hackintosh project aims to be an all-in-one maintained hub for Opencore-based hackintoshes on the HP ProDesk G1 family. In short, this HP ProDesk 400 G1 Hackintosh is very stable and can be used as daily driver. I fully recommend this project to anyone looking for an old Mac Pro alternative.
You can find a wealth of knowledge on Reddit, TonyMacX86 or Google.
Should you find an error, or improve anything, be it in the config itself or in the my documentation, please consider opening an issue or a pull request to contribute.
I am not responsible for any damages you may cause.
- Same hardware configuration: No need to swap GPU cards or Ethernet cards.
- Same BIOS configuration: No need to change BIOS configuration to run a specific macOS version.
- Same connectors: No need to switch video output, LAN, USB to run a specific macOS version.
- Same bootloader: No need to use different bootloader like Chameleon or Clover for older macOS versions. OpenCore covers all Intel macOS releases.
- Same config.plist: No need to have multiple config.plist to run specific macOS versions.
These are relevant components on my machine that may differ from yours, so keep these in mind as you will need to adjust accordingly, depending on your machine's configuration.
| Category | Component |
|---|---|
| Processor | Intel Core i7-4770 (3.40 GHz) |
| Graphic Card | NVIDIA Quadro FX 5600 1536 MB (G80) |
| Storage | 2TB SATA SSD, 128GB SATA SSD, and 32GB USB flash drive |
| Memory | 8 GB 1600 MHz DDR3 |
| Ethernet | Realtek RTL8151GH-CG |
| Audio | Realtek ALC221 |
| Bluetooth | CSR8510 A10 4.0 |
| BIOS | 2.56 Rev.A (30/04/2019) |
This is an overview of hardware compatibility list for all Intel-based macOS.
| macOS | i7-4770 | AHCI SATA SSD | Quadro FX 5600 | RTL8151GH-CG | ALC221 | CSR8510 A10 4.0 |
|---|---|---|---|---|---|---|
| Sonoma | ✅ | ✅ | 5️⃣ | ✅ | ✅ | ✅ |
| Ventura | ✅ | ✅ | 5️⃣ | ✅ | ✅ | ✅ |
| Monterey | ✅ | ✅ | 5️⃣ | ✅ | ✅ | ✅ |
| Big Sur | ✅ | ✅ | 5️⃣ | ✅ | ✅ | ✅ |
| Catalina | ✅ | ✅ | 4️⃣ | ✅ | ✅ | ✅ |
| Mojave | ✅ | ✅ | 3️⃣ | ✅ | ✅ | ✅ |
| High Sierra | ✅ | ✅ | ✅ | ✅ | ✅ | ✅ |
| Sierra | ✅ | ✅ | ✅ | ✅ | ✅ | ✅ |
| El Capitan | ✅ | ✅ | ✅ | ✅ | ✅ | ✅ |
| Yosemite | ✅ | ✅ | ✅ | ✅ | ✅ | ✅ |
| Mavericks | ✅ | ✅ | ✅ | ✅ | ✅ | ✅ |
| Mountain Lion | ✅ | ✅ | ✅ | ✅ | ✅ | ✅ |
| Lion | 1️⃣ | ✅ | ✅ | ✅ | ✅ | ✅ |
| Snow Leopard | 1️⃣ | ✅ | ✅ | ✅ | ✅ | ✅ |
| Leopard | ✅ | ✅ | ✅ | ✅ | 6️⃣ | ✅ |
| Tiger | ✅ | 2️⃣ | ✅ | ✅ | 6️⃣ | ✅ |
1️⃣ Spoof CPUID to Nehalem (0x0106A2)
2️⃣ Install Mac OS X Tiger on a USB drive
3️⃣ Install Old NVIDIA macOS Mojave from chris1111
4️⃣ Install Legacy Video Patch from chris1111
5️⃣ Install OpenCore Legacy Patcher
6️⃣ Use a USB DAC headset/speaker
The beauty of the Intel 4th Gen Core Series is that it is old enough to run Mac OS X Tiger 10.4 and recent enough to run macOS Sonoma natively. However, you will need a custom kernel in Mac OS X Tiger 10.4, and spoof CPUID to Nehalem for Mac OS X Snow Leopard 10.6 and Lion 10.7.
This was the trickiest part. I needed a GPU that is natively compatible with Tiger and could be patched with OCLP in Sonoma. I consulted Dortania GPU Buyers Guide, for both the Legacy AMD and Legacy Nvidia, and here's what I discovered:
-
For AMD, I found that the HD 2000 Series is natively supported from 10.4 to 10.13, I tested AMD Radeon HD 2400 XT but it didn't work with any of the supposedly supported macOS versions, it turns out that legacy AMD GPUs are a hit or a miss even though they are officially supported by Apple, unlike Nvidia's legacy GPUs which should work properly if you patch your GPU in DeviceProperties.
-
I bought an NVIDIA Quadro FX 5600 that is compatible with Mac OS X Leopard through macOS High Sierra according to Dortania but, apparently, this GPU is also compatible with Mac OS X Tiger if you use
NVinject.kext. In fact, after using this GPU withNVinject.kext, NVIDIA legacy patching, and OCLP, it worked with all versions of Intel-based macOS. The G80 NVIDIA Tesla GPUs are the best suited to this type of hackintosh, with GeForce 8800 GTS 320/640 and Quadro FX 5600 known to work. -
Please note that legacy GPUs need CSM/Legacy Boot to be enabled in the BIOS settings, otherwise you will get a blank screen when you boot the computer.
-
If you don't want to buy an old GPU, you can use the iGPU (Intel HD 4600), which is supported from OS X Mountain Lion 10.8 up to macOS Monterey 12, and can be used on macOS Ventura and Sonoma with OCLP. On Mac OS X Lion 10.7 and earlier it runs fine but without hardware acceleration (QE/CI).
-
Fun fact: If you install Mac OS X Tiger, Leopard, and/or Snow Leopard from another Mac OS X using "OSInstall.mpkg" you will get the welcome video intro without a compatible GPU (hardware acceleration).
- The first problem with storage is that AHCI causes kernel panic with Mac OS X Tiger, so I had to disable
AppleAHCIPortfor 10.4 in the config.plist file and install Tiger on a USB drive. - The second issue is a weird one! 1/2 times OS X Mountain Lion doesn't detect my 2TB SSD and thus I'm stuck at "Waiting for root device", I had to install Mountain Lion on a 128 GB SSD.
- The other macOS releases can be installed on any SATA SSD without any problem.
It was a bit complicated to get my Ethernet (Realtek RTL8151GH-CG) to work on all versions of macOS. I had to use three different kexts:
- RealtekR1000 for Mac OS X Tiger and Leopard while forcing
IONetworkingFamily. - Realtek RTL8111 v1.2.3 for Mac OS X Snow Leopard up to macOS High Sierra while forcing
IONetworkingFamilyfor Mac OS X Snow Leopard up to Yosemite. - RealtekRTL8111 v2.4.2 for macOS Mojave and later.
On-board audio Realtek ALC221:
- Not working on Mac OS X Leopard and Tiger! Consider using a USB DAC headset/speaker for audio funcionality.
- Working on Mac OS X Snow Leopard and Lion using VoodooHDA-FAT
- Working on OS X Mountain Lion and later using
AppleALCwith layout-id 11 andSSDT-HPET.aml.
CSR8510 A10 4.0 USB dongle:
- Works natively on Mac OS X Tiger through to macOS Big Sur.
BlueToolFixup.kextis required on macOS Monterey and later.
This is not a guide. It shoud only be used as a reference or if you have the exact same machine. I give a few tips and tricks I've learned on my journey into building a hackintosh. The best way of using this is as a companion to the OpenCore guide. If you have questions about how to setup your specific hardware, are unclear about what to do, or would like to see the settings I've used.
I understand that some may simply add the OC and Boot folders to their EFI folder. For clarity the EFI partition needs a folder called EFI that contains the Boot and OC folder.
EFI (partition)
	EFI
	├── BOOT
	├── OC
It should work and your HP ProDesk 400 G1 should boot and operate correctly. At the very least, you'll need to generate SMBIOS values if you want Apple services to work. Note that all error reporting/logging has been turned off in the config.plist. You will have a difficult time trouble shooting with the setup provided. You can easily turn on the error reporting and logging if you follow the Dortania guide. Best of luck.
NOTE if you simply wish to copy my EFI please do the following:
- Generate SMBIOS values and add them in the config.plist (Use specific SMBIOS depending on which macOS you want to install, see below for more info)
- Ensure the value of
showpickeristruein the config.plist file to provide the opencore menu when booting.- Prepare your install USB
- Move the entire EFI folder (with your modifications) to the proper partition on your USB (or SSD once the install is complete).
- Install - You'll need to select F9 to get the boot menu options and boot from the USB each time the computer restarts until you've copied the EFI folder onto the hard drive. You may also need to select the correct boot option during install.
If you have a slightly different computer, you should follow the one and only guide to macOS installation guide provided by Dortania
| Feature | Status | Dependency | Remarks |
|---|---|---|---|
| Full Graphics Accleration (QE/CI) | ✅ | NVinject.kext, WhateverGreen.kext, and NVIDIA legacy patching NVCAP |
NVIDIA Quadro FX 5600 is natively supported on Mac OS X Tiger through to macOS High Sierra, and needs patchers with macOS Mojave and later |
| Audio Output (Front/Back) | ✅ | SSDT-HPET.aml, AppleALC.kext with Layout ID = 11 and VoodooHDA-FAT.kext |
Not working on Mac OS X Tiger and Leopard |
| Audio Input (Front/Back) | ✅ | SSDT-HPET.aml, AppleALC.kext with Layout ID = 11 and `VoodooHDA-FAT.kext |
Not working on Mac OS X Tiger and Leopard |
| Internal Speaker | ✅ | SSDT-HPET.aml, AppleALC.kext with Layout ID = 11 and `VoodooHDA-FAT.kext |
Not working on Mac OS X Tiger and Leopard |
| Automatic Headphone Output Switching | ✅ | SSDT-HPET.aml, AppleALC.kext with Layout ID = 11 and `VoodooHDA-FAT.kext |
Not working on Mac OS X Tiger and Leopard |
| Feature | Status | Dependency | Remarks |
|---|---|---|---|
| CPU Power Management | ✅ | SSDT-PLUG.aml |
Not working on Mac OS X Tiger and Leopard |
| Sleep / Wake | ✅ | - | Not working on Mac OS X Tiger and Leopard |
| Feature | Status | Dependency | Remarks |
|---|---|---|---|
| Bluetooth | ✅ | BlueToolFixup.kext |
CSR 4.0 Bluetooth USB dongle is natively supported on Mac OS X Tiger through to macOS Big Sur, BlueToolFixup.kext is required on macOS Monterey and later |
| Ethernet | ✅ | RealtekR1000.kext, RealtekRTL8111-SL.kext, and RealtekRTL8111.kext |
- |
| USB 2.0 / USB 3.0 | ✅ | USBMap.kext |
Create your own USBMap.kext using CorpNewt |
| Feature | Status | Dependency | Remarks |
|---|---|---|---|
| Boot chime | ✅ | - | Works like a charme |
Everything is working!
| Component | Version |
|---|---|
| OpenCore | 1.0.0 |
| OpenCore Legacy Patcher | 1.5.0 |
| macOS Sonoma | 14.5 (23F79) |
| macOS Ventura | 13.6.7 (22G720) |
| macOS Monterey | 12.7.5 (21H1222) |
| macOS Big Sur | 11.7.10 (20G1427) |
| macOS Catalina | 10.15.7 (19H15) |
| macOS Mojave | 10.14.6 (18G103) |
| macOS High Sierra | 10.13.6 (17G66) |
| macOS Sierra | 10.12.6 (16G29) |
| OS X El Capitan | 10.11.6 (15G31) |
| OS X Yosemite | 10.10.5 (14F27) |
| OS X Mavericks | 10.9.5 (13F34) |
| OS X Mountaion Lion | 10.8.5 (12F37) |
| Mac OS X Lion | 10.7.5 (11G63) |
| Mac OS X Snow Leopard | 10.6.8 (10K549) |
| Mac OS X Leopard | 10.5.8 (9L31a) |
| Mac OS X Tiger | 10.4.11 (8S2167) |
Mac OS X Tiger cannot run on this computer with vanilla kernel, it needs a custom kernel from the early hackintosh distros. I used 8.9.1 kernel SSE3 apr18 custom kernel extracted from XxX OS x86 10.4.11.
Then we need to copy it to the USB installer, to the disk after installation, and after applying each update before rebooting, otherwise you won't be able to boot Mac OS X Tiger.
| Component | Description |
|---|---|
| SSDT-EC | Fixes the embedded controller |
| SSDT-PLUG | Allows for native CPU power management |
| SSDT-HPET | Used for resolving IRQ conflicts (Fixing Audio issue with AppleALC) |
| Kext | Version | Description |
|---|---|---|
| Lilu | 1.6.7 | Used for arbitrary kext, library, and program patching on Mac OS X Snow Leopard and later only, due to kernel panic on 32-bit only kernels |
| VirtualSMC | 1.3.2 | Used to emulate Apple SMC in the kernel on Mac OS X Snow Leopard and later only, due to kernel panic on 32-bit only kernels |
| FakeSMC-32 | 2.5 | Used to emulate Apple SMC on Mac OS X Tiger and Leopard (32-bit only kernels) |
| NVinject | 0.0.10c | Used to enable graphics acceleration on Mac OS X Tiger |
| WhateverGreen | 1.6.6 | Used to patch GPU on Mac OS X Snow Leopard and later |
| VoodooHDA-FAT | - | Used to enable onboard audio on Mac OS X Snow Leopard and Lion |
| AppleALC | 1.9.0 | Used to enable onboard audio on OS X Mountain Lion and later |
| RealtekR1000 | 1.0.4 | Used to enable ethernet on Mac OS X Tiger and Leopard |
| RealtekRTL8111-SL | 1.2.3 | Used to enable ethernet on Mac OS X Snow Leopard through macOS High Sierra |
| RealtekRTL8111 | 2.4.2 | Used to enable ethernet on macOS Mojave and later |
| USBMap | - | Used to map USB ports on all macOS releases |
| BlueToolFixup | 2.6.8 | Used to enable USB Bluetooth dongle support on macOS Monterey and later |
| AMFIPass | 1.4.0 | Used to enable OpenCore Legacy Patcher on macOS Big Sur and later |
| SMCSuperIO | 1.3.2 | Used to monitor fan speed on Mac OS X Snow Leopard and later |
| SMCProcessor | 1.3.2 | Used to monitor Intel CPU temperature on Mac OS X Lion and later |
| RestrictEvents | 1.1.3 | Used to patch various functions on macOS Big Sur and later |
| Driver | Version | Description |
|---|---|---|
| OpenRuntime | OpenCorePkg 1.0.0 | Essentiel to patch boot.efi for NVRAM fixes |
| AudioDxe | OpenCorePkg 1.0.0 | Enable Boot Chime |
| OpenCanopy | OpenCorePkg 1.0.0 | Enable graphical boot picker |
| OpenHfsPlus | OpenCorePkg 1.0.0 | Required to see HFS volumes (macOS Installers and Recovery partitions |
| OpenPartitionDxe | OpenCorePkg 1.0.0 | Required to load installers and recovery on OS X Mavericks and earlier |
| ResetNvramEntry | OpenCorePkg 1.0.0 | Allow to reset NVRAM from boot picker |
| ToggleSipEntry | OpenCorePkg 1.0.0 | Allow to toggle SIP from boot picker |
The following config.plist has been optimized to boot all Intel-based macOS releases without extra Quirks and patches. The settings provided are specific to the HP ProDesk 400 G1 and may not be applicable to your computer.
Please refer to Dortania's OpenCore Install Guide and OpenCore Reference Manual to adapt your config.plist to your system.
In this section I will explain each parameter used in config.plist to give you an overview of this hackintosh.
ACPI
SSDT-EC.aml
SSDT-PLUG.aml
SSDT-HPET.aml
These patches are generated when choosing SSDT-HPET patch with SSDTTime.
| Find | Replace | Comment |
|---|---|---|
| 0014275F 535441 | 00142758 535441 | HPET_STA to XSTA Rename |
| 055F4352 53 | 05584352 53 | HPET_CRS to XCRS Rename |
| 22040079 00 | 22000079 00 | IPIC IRQ 2 Patch |
| 22000179 00 | 22000079 00 | RTC IRQ 8 Patch |
| 22010079 00 | 22000079 00 | TIMR IRQ 0 Patch |
Booter
As -no_compat_check disables system updates, it is best to apply this patch from OpenCore Legacy Patcher.
| Comment | Find | Replace |
|---|---|---|
| Skip Board ID check | 0050006C 00610074 0066006F 0072006D 00530075 00700070 006F0072 0074002E 0070006C 00690073 0074 | 002E002E 002E002E 002E002E 002E002E 002E002E 002E002E 002E002E 002E002E 002E002E 002E002E 002E |
| Reroute HW_BID to OC_BID | 48005700 5F004200 49004400 | 4F004300 5F004200 49004400 |
References:
- https://github.com/5T33Z0/OC-Little-Translated/tree/main/09_Board-ID_VMM-Spoof
- https://dortania.github.io/OpenCore-Legacy-Patcher/PATCHEXPLAIN.html#opencore-settings
The following Quirks are used:
-
AllowRelocationBlock: Required to boot Mac OS X Lion 10.7 and earlier when CSM/Legacy Boot is turned on in BIOS. -
AvoidRuntimeDefrag: Fixes UEFI runtime services like date, time, NVRAM, power control, etc. -
EnableSafeModeSlide: Enables slide variables to be used in safe mode, however this quirk is only applicable to UEFI platforms. -
EnableWriteUnprotector: Needed to remove write protection from CR0 register. -
RebuildAppleMemoryMap: Required for Mac OS X Snow Leopard 10.6 and earlier. -
SetupVirtualMap: Fixes SetVirtualAddresses calls to virtual addresses.
DeviceProperties
Use your own patch if you have a different GPU. However, this patch is not applicable for Mac OS X Tiger 10.4, NVinject.kext is required.
| Key | Value | String |
|---|---|---|
| @0,compatible | NVDA,NVMac | STRING |
| @0,device_type | display | STRING |
| @0,name | NVDA,Display-A | STRING |
| @1,compatible | NVDA,NVMac | STRING |
| @1,device_type | display | STRING |
| @1,name | NVDA,Display-B | STRING |
| NVCAP | 05000100 10000300 0C000000 0000000F 00000000 | DATA |
| VRAM,totalsize | 00000060 | DATA |
| device_type | NVDA,Parent | STRING |
| model | NVIDIA Quadro FX 5600 | STRING |
| rom-revision | 1536.071010 | STRING |
Note: This patch is only required for Mac OS X Leopard and Snow Leopard to enable graphics acceleration. If you are running Mac OS X Lion or later, this patch is not necessary.
Kernel
Adding Kexts with MinKernel and MaxKernel, and Arch type to allow booting all macOS releases from the same EFI folder.
Please refer to the Kernel Support Table.
| Arch | BundlePath | MinKernel | MaxKernel |
|---|---|---|---|
| x86_64 | Lilu.kext | 10.0.0 | |
| x86_64 | VirtualSMC.kext | 10.0.0 | |
| i386 | FakeSMC-32.kext | 8.0.0 | 9.99.99 |
| i386 | NVinject.kext | 8.0.0 | 8.99.99 |
| x86_64 | WhateverGreen.kext | 10.0.0 | |
| x86_64 | VoodooHDA-FAT.kext | 10.0.0 | 11.99.99 |
| x86_64 | AppleALC.kext | 12.0.0 | |
| i386 | RealtekR1000.kext | 8.0.0 | 9.99.99 |
| x86_64 | RealtekRTL8111-SL.kext | 10.0.0 | 17.99.99 |
| x86_64 | RealtekRTL8111.kext | 18.0.0 | |
| Any | USBMap.kext | ||
| x86_64 | BlueToolFixup.kext | 21.0.0 | |
| x86_64 | AMFIPass.kext | 20.0.0 | |
| x86_64 | SMCSuperIO.kext | 10.0.0 | |
| x86_64 | SMCProcessor.kext | 11.0.0 | |
| x86_64 | RestrictEvents.kext | 20.0.0 |
Blocking kexts to prevent kernel panic on Mac OS X Tiger 10.4 and Mac OS X Leopard 10.5. As a result, AHCI is unusable in Mac OS X Tiger 10.4, and must be installed on a USB drive.
| Arch | Identifier | MinKernel | MaxKernel | Strategy |
|---|---|---|---|---|
| i386 | com.apple.driver.AppleAHCIPort | 8.0.0 | 8.99.99 | Disable |
| i386 | com.apple.driver.EFIRuntime | 8.0.0 | 9.99.99 | Disable |
Force loading IONetworkingFamily.kext to allow Ethernet to run on OS X Yosemite 10.10 and earlier.
| Arch | BundlePath | Identifier | ExecutablePath | PlistPath | MinKernel | MaxKernel |
|---|---|---|---|---|---|---|
| Any | System/Library/Extensions/IONetworkingFamily.kext | com.apple.iokit.IONetworkingFamily | Contents/MacOS/IONetworkingFamily | Contents/Info.plist | 8.0.0 | 14.99.99 |
DummyPowerManagement is required for Mac OS X Snow Leopard 10.6.6 and earlier (10.6.7 and 10.6.8 do not need this patch) to avoid kernel panic. Instead of enabling it in Emulate, an equivalent patch is applied to target only 10.6.6 and earlier.
| Arch | Identifier | Base | Replace | MinKernel | MaxKernel | Count |
|---|---|---|---|---|---|---|
| Any | com.apple.driver.AppleIntelCPUPowerManagement | __ZN28AppleIntelCPUPowerManagement5startEP9IOService | B8010000 00C3 | 8.0.0 | 10.6.99 | 1 |
Haswell is not supported in Mac OS X Lion 10.7 and Mac OS X Snow Leopard 10.6, we need to spoof Nehalem (0x0106A2) CPUID. Interestingly, using Nehalem's CPUID instead of Ivy Bridge or Sandy Bridge avoids the need for DummyPowerManagement. CPUID spoofing is not required in Mac OS X Tiger 10.4 and Leopard 10.5.
-
Cpuid1Data:
A2060100 00000000 00000000 00000000 -
Cpuid1Mask:
FFFFFFFF 00000000 00000000 00000000 -
MinKernel:
10.0.0 -
MaxKernel:
11.99.99
The following Quirks are used:
-
DisableLinkeditJettison: Allows Lilu and others to have more reliable performance without keepsyms=1. (macOS Big Sur 11 and later) -
ProvideCurrentCpuInfo: Provides current CPU info to the kernel (Required for Mac OS X Tiger 10.4)
Misc
These settings are not essential, they are just preferences, you can use my configuration as is, and refer to Dortania guide for more customization.
If you don't have a 4:3 monitor, set PickerVariant to GeldenGateExt_16-9 or GeldenGateExt_16-10 depending on your monitor's ratio. This adjustment is made because the NVIDIA Quadro FX 5600 has no GOP, which limits the bootloader to display only 1280x1024 or 800x600. This causes distortion on a 16:9 or 16:10 display, which is why the aspect ratio of the icon is modified.
All debug and logging settings are disabled.
SecureBootModel must be disabled for OCLP to run.
NVRAM
This setting allows OTA update on macOS Big Sur 11.3 and later.
| Key | Value | Type |
|---|---|---|
| revpatch | sbvmm | STRING |
For more details on revpatch=sbvmm, refer to RestrictEvents.
SystemAudioVolume: Set the volume of Boot-chime.
csr-active-config: Set the minimum SIP value required to allow the execution of OCLP's Root Patches.
| Key | Value | Type |
|---|---|---|
| SystemAudioVolume | 46 | DATA |
| csr-active-config | 03080000 | DATA |
PlatformInfo
The adequate SMBIOS for this computer is iMac15,1, with this SMBIOS and the patches used previously, it can boot all macOS releases. Although some versions of macOS cannot be installed with this SMBIOS, you should choose a compatible SMBIOS during installation, we will discuss this further in the macOS Installation section below.
You need to generate your own Serial Number using GenSMBIOS
UEFI
By default, OpenCore only loads APFS drivers from macOS Big Sur and newer. If you are booting macOS Catalina or earlier, you need to set a new minimum version/date as shown below. Not setting this can result in OpenCore not finding your macOS partition!
-
MinDate:
-1 -
MinVersion:
-1
The following settings and AudioDxe.efi driver enable the Boot-chime.
-
AudioDevice:
PciRoot(0x0)/Pci(0x1B,0x0) -
PlayChime:
Enabled -
AudioSupport:
True
| Path | Enabled |
|---|---|
| OpenRuntime.efi | True |
| AudioDxe.efi | True |
| OpenCanopy.efi | True |
| OpenHfsPlus.efi | True |
| OpenPartitionDxe.efi | True |
| ResetNvramEntry.efi | True |
| ToggleSipEntry.efi | True |
- Connect Drivers:
True
The following settings enable you to use the mouse and keyboard in OpenCore boot picker.
-
KeyForgetThreshold:
5 -
KeySupportMode:
Auto -
PointerSupportMode:
ASUS -
TimeResolution: `50000
-
KeySupport:
True -
PointerSupport:
True
The following Quirks are used:
-
EnableVectorAcceleration: Enable AVX vector acceleration of SHA-512 and SHA-384 hashing algorithms -
RequestBootVarRouting: This quirk requires OC_FIRMWARE_RUNTIME protocol implemented in OpenRuntime.efi. The quirk lets default boot entry preservation at times when the firmware deletes incompatible boot entries. In summary, this quirk is required to reliably use the Startup Disk preference pane in firmware that is not compatible with macOS boot entries by design
YouTube videos of running every macOS on the same computer (Click on the image to play the video)


Mac OS X Tiger


Mac OS X Leopard


Mac OS X Snow Leopard


Mac OS X Lion


OS X Mountain Lion


OS X Mavericks


OS X Yosemite


OS X El Capitan


macOS Sierra


macOS High Sierra


macOS Mojave


macOS Catalina


macOS Big Sur


macOS Monterey


macOS Ventura


macOS Sonoma


-
Haswell-Hackintosh-every-macOS repository:
-
HP-ProDesk-400-G1-Hackintosh repositories:
-
HP-ProDesk-600-G1-Hackintosh repositories:
- The guys from Acidanthera that make this possible
- Apple for macOS
- CorpNewt for USBMap and gibMacOS
- headkaze for Hackintool
- Mieze for RealtekRTL8111
- RehabMan for old versions of RealtekRTL8111
- dosdude1 and chris1111 for Mojave/Catalina Legacy Video Patcher
- dmitri-arekhta for 32-bit of RealtekR1000
- khronokernel for Legacy Kexts
- People at r/hackintosh for their advice and help
- And every other contributor
Storage
- Storage Options
SATA EmulationAHCI
Security
-
Network Boot
Network BootDisabled
-
System Security
Data Execution PreventionEnabledVirtualization Technology (VTx)EnabledVirtualization Technology Directed I/O (VTd)Disabled
-
Secure Boot Configuration
Legacy SupportEnabledSecure BootDisabledFast BootDisabled
Advanced
-
Onboard Devices
Serial Port ADisabled
-
Device Options
Integrated VideoDisabled
-
Option ROL Launch Policy
PXE Option ROMsDo Not LaunchVideo Option ROMsLegacy Only
The installation of macOS differs from one version to another, some versions need a specific SMBIOS to install, others have installation problems for various reasons, in particular legacy macOS (macOS Sierra and earlier).
In this section, I will explain in detail how to prepare the installer, install each version of macOS and apply updates and patches. Please note that these steps may not all apply to you.
It is recommanded to install all available updates on macOS Mojave and later, and then apply the patches, otherwise you will have to re-apply the patches after each update.
The macOS installation will be chronological as follows:
Mac OS X Tiger (10.4.10)
Installing Mac OS X Tiger 10.4.10 is a little trickier, we will need a custom kernel to boot.
You will find below the steps on how to proceed.
References:
-
Download 10.4.10-8R4088-ACDT.dmg from Acidanthera Image (No need to download other images, we can install updates directly from Mac OS X Tiger after installation from Apple servers).
-
At least a 16 GB USB drive with HFS+ file system partition and GPT partition scheme is required.
-
Restore
10.4.10-8R4088-ACDT.dmgfrom~/Downloads/10.4.10-8R4088-ACDT.dmgto a USB drive following the steps below usingimagescan(to scan the downloaded image, this step munges some headers, and is requiredand), andasrcommand (Disk Utility will probably not work):
asr imagescan --source ~/Downloads/10.4.10-8R4088-ACDT.dmg
sudo asr restore --source ~/Downloads/10.4.10-8R4088-ACDT.dmg --target /dev/disk6s2 --erase
Replace /dev/disk6s2 with your USB drive BSD device node
- If the previous step fails, mount
10.4.10-8R4088-ACDT.dmgand use this command instead:
sudo asr restore --source /Volumes/Mac\ OS\ X\ Install\ Disc\ 1 --target /dev/disk6s2 --erase
- Copy the custom kernel into the newly prepared USB installer using the following command:
sudo cp ~/Downloads/mach_kernel /Volumes/Mac\ OS\ X\ Install\ Disc\ 1/mach_kernel
You will not be able to boot the USB installer unless you use a custom kernel.
Installation of Mac OS X Tiger is simple.
-
Boot with the previously prepared EFI folder into Mac OS X Tiger Installer.
-
Install Mac OS X Tiger following normal procedure.
The custom kernel must be replaced in the root volume after each update before restarting.
-
Install all available updates, including 10.4.11, using "Software Update".
-
Before restarting, copy the custom kernel back to the root volume using the following command:
sudo cp /Volumes/Mac\ OS\ X\ Install\ Disc\ 1/mach_kernel /Volumes/Tiger/mach_kernel
You will not be able to boot Mac OS X Tiger if you don't use a custom kernel.
- As sleep mode does not work in Mac OS X Tiger, it is best to disable it from
System Preferences -> Energy Saverto prevent the system from freezing after a period of idle time.
Mac OS X Leopard (10.5.7)
We need to change the SMBIOS to MacBookPro5,3 to install Mac OS X Leopard 10.5.7.
You will find bellow the steps on how to proceed.
References:
-
Download 10.5.7-9J3050.dmg from Acidanthera Image (No need to download other images, we can install updates directly from Mac OS X Leopard after installation from Apple servers).
-
At least an 8 GB USB drive with HFS+ file system partition and GPT partition scheme is required.
-
Restore
10.5.7-9J3050.dmgfrom~/Downloads/10.5.7-9J3050.dmgto a USB drive following the steps below usingimagescan(to scan the downloaded image, this step munges some headers, and is requiredand), andasrcommand (Disk Utility will likely not work):
asr imagescan --source ~/Downloads/10.5.7-9J3050.dmg
sudo asr restore --source ~/Downloads/10.5.7-9J3050.dmg --target /dev/disk6s3 --erase
Replace /dev/disk6s3 with your USB drive BSD device node
- If the previous step fails, mount
10.5.7-9J3050.dmgand use this command instead:
sudo asr restore --source /Volumes/Mac\ OS\ X\ Install\ DVD --target /dev/disk6s3 --erase
-
Set the SMBIOS to
MacBookPro5,3and boot into the installer. -
Install Mac OS X Leopard following normal procedure.
-
You may receive an error message saying "Install Failed - The installer could not make the computer start up from the volume Leopard", just ignore it and click on "Restart", you should be able to boot Mac OS X Leopard.
-
Set the SMBIOS back to
iMac15,1.
-
Install all available updates, including 10.5.8 using "Software Update".
-
As sleep mode does not work in Mac OS X Leopard, it is best to disable it from
System Preferences -> Energy Saverto prevent the system from freezing after a period of idle time.
Mac OS X Snow Leopard (10.6.7)
The installation of Mac OS X Snow Leopard is simple compared to Mac OS X Tiger and Leopard, there's no need for a specific SMBIOS.
You will find bellow the steps on how to proceed.
References:
-
Download 10.6.7-10J4139-ACDT-OSX.dmg from Acidanthera Image (No need to download other images, we can install updates directly from Mac OS X Snow Leopard after installation from Apple servers).
-
At least an 8 GB USB drive with HFS+ file system partition and GPT partition scheme is required.
-
Restore
10.6.7-10J4139-ACDT-OSX.dmgfrom~/Downloads/10.6.7-10J4139-ACDT-OSX.dmgto a USB drive following the steps below usingimagescan(to scan the downloaded image, this step munges some headers, and is requiredand), andasrcommand (Disk Utility will likely not work):
asr imagescan --source ~/Downloads/10.6.7-10J4139-ACDT-OSX.dmg
sudo asr restore --source ~/Downloads/10.6.7-10J4139-ACDT-OSX.dmg --target /dev/disk6s4 --erase
Replace /dev/disk6s4 with your USB drive BSD device node
- If the previous step fails, mount
10.6.7-10J4139-ACDT-OSX.dmgand use this command instead:
sudo asr restore --source /Volumes/Mac\ OS\ X\ Install\ DVD --target /dev/disk6s4 --erase
Install Mac OS X Snow Leopard following normal procedure.
Install all available updates, including 10.6.8 using "Software Update".
Mac OS X Lion (10.7.5)
The installation of Mac OS X Lion is similar to Mac OS X Leopard, you need a specific SMBIOS.
You will find below the steps on how to proceed.
References:
- Dortania's USB Creation.
- Dortania's Legacy macOS: Offline Method.
- Restoring images without the futility of Disk Utility
-
Download Mac OS X Lion Installer from Apple website.
-
At least an 8 GB USB drive with HFS+ file system partition and GPT partition scheme is required.
-
Extract the installer using the following commands.
cd ~/Downloads
pkgutil --expand-full "/Volumes/Install Mac OS X/InstallMacOSX.pkg" OSInstaller
- Restore
InstallESD.dmgfrom~/Downloads/OSInstaller/InstallMacOSX.pkg/InstallESD.dmgto a USB drive following the steps below usingimagescan(to scan the downloaded image, this step munges some headers, and is requiredand), andasrcommand (Disk Utility will likely not work):
asr imagescan --source ~/Downloads/OSInstaller/InstallMacOSX.pkg/InstallESD.dmg
sudo asr restore --source ~/Downloads/OSInstaller/InstallMacOSX.pkg/InstallESD.dmg --target /dev/disk6s6 --erase
Replace /dev/disk6s6 with your USB drive BSD device node
- If the previous step fails, mount
InstallESD.dmgand use this command instead:
sudo asr restore --source /Volumes/Mac\ OS\ X\ Install\ ESD --target /dev/disk6s6 --erase
-
Set the SMBIOS to
iMac12,2and boot Mac OS X Lion installer. -
Install Mac OS X Lion following normal procedure.
-
The
iMac12,2SMBIOS needs to be applied during the whole installation process, after the installation, you can go back toiMac15,1SMBIOS.
Install all available updates using "Software Update".
OS X Mountain Lion (10.8.5)
The installation of OS X Mountain Lion is similar to Mac OS X Lion, you need a specific SMBIOS.
You will find below the steps on how to proceed.
References:
- Dortania's USB Creation.
- Dortania's Legacy macOS: Offline Method.
- Restoring images without the futility of Disk Utility
- OS X Mountain Lion Wiki Page
-
Download Mac OS X Mountain Lion Installer from Apple website.
-
At least an 8 GB USB drive with HFS+ file system partition and GPT partition scheme is required.
-
Extract the installer using the following commands.
cd ~/Downloads
pkgutil --expand-full "/Volumes/Install Mac OS X/InstallMacOSX.pkg" OSInstaller
- Restore
InstallESD.dmgfrom~/Downloads/OSInstaller/InstallMacOSX.pkg/InstallESD.dmgto a USB drive following the steps below usingimagescan(to scan the downloaded image, this step munges some headers, and is requiredand), andasrcommand (Disk Utility will likely not work):
asr imagescan --source ~/Downloads/OSInstaller/InstallMacOSX.pkg/InstallESD.dmg
sudo asr restore --source ~/Downloads/OSInstaller/InstallMacOSX.pkg/InstallESD.dmg --target /dev/disk6s6 --erase
Replace /dev/disk6s6 with your USB drive BSD device node
- If the previous step fails, mount
InstallESD.dmgand use this command instead:
sudo asr restore --source /Volumes/OS\ X\ Install\ ESD --target /dev/disk6s6 --erase
-
Set the SMBIOS to
iMac14,2and boot OS X Mountain Lion installer. -
Install OS X Mountain Lion following normal procedure.
-
The
iMac14,2SMBIOS must be applied during the whole installation process, after the installation, you can go back toiMac15,1SMBIOS.
OS X Mountain Lion was the first version to use the Mac App Store to install system updates, and unfortunately the Mac App Store no longer works in Mountain Lion and earlier versions. Therefore, OS X 10.8 remains the only macOS version for which updates have to be installed manually.
There's only one update available that we can install. Download Security Update 2015-006 Mountain Lion and install it. The final build should be 12F2560.
OS X Mavericks (10.9.5)
Preparing the installer and installing OS X Mavericks is the most challenging of all macOS versions, for the following reasons:
-
Apple no longer provides the installer, and the only way to download it from Apple is if you've already downloaded it in the past from the Mac App Store (Purchase History), otherwise you will need to download it from a reliable source. The Online Method as suggested by Dortania will not work.
-
OS X Mavericks is the first macOS to have a problem when we start the installation process due to various issues mentioned here, until macOS Sierra you will receive this message
This copy of the Install Mac OS X can't be verified. It may have been corrupted or tampered with during downloadif you use thecreateinstallmediatool. -
You need a specific SMBIOS aswell.
You will find below the steps on how to overcome all mentioned obstacles.
References:
- Dortania's USB Creation.
- Restoring images without the futility of Disk Utility
- mas-cli
- Alternative to
createinstallmedia
Download from Mac App Store
If you have previously downloaded OS X Mavericks from the Mac App Store (Purchase History) proceed as follows:
-
Install Homebrew (if you don't already have it).
-
Install mas-cli:
brew install mas -
Download OS X Mavericks:
mas install 675248567
After the download/installation finishes, you will find Install OS X Mavericks.app in you /Applications folder.
Download from Archive.org
If you've never obtained OS X Mavericks from the Mac App Store, you can download my copy (downloaded using the previous method) from archive.org.
Prepare the USB drive
The method bellow should be used to overcome the error message This copy of the Install Mac OS X can't be verified. It may have been corrupted or tampered with during download instead of the createinstallmedia tool.
-
At least an 8 GB USB drive with HFS+ file system partition and GPT partition scheme is required.
-
Extract the installer using these commands:
cd ~/Downloads
pkgutil --expand-full /Applications/Install\ OS\ X\ Mavericks.app/Contents/SharedSupport/InstallESD.dmg OSInstaller
- Attach
InstallESD.dmgandBaseSystem.dmg
hdiutil attach ~/Downloads/OSInstaller/InstallMacOSX.pkg/InstallESD.dmg
cp /Volumes/OS\ X\ Install\ ESD/BaseSystem.dmg ~/Downloads/OSInstaller/BaseSystem.dmg
hdiutil attach ~/Downloads/OSInstaller/BaseSystem.dmg
- Restore the attached image
BaseSystem.dmg(replace/dev/disk7s1with BaseSystem.dmg attached BSD device node, and /dev/rdisk8s11 with your USB drive BSD device node)
sudo asr restore --source /dev/disk7s1 --target /dev/rdisk8s11 --erase --noprompt --noverify
-
Rename the USB drive to
Install OS X Mavericks -
Copy the
Packagesfolder fromInstallESDto the USB drive:
rm -r /Volumes/Install\ OS\ X\ Mavericks/System/Installation/Packages
cp -rpv /Volumes/OS\ X\ Install\ ESD/Packages /Volumes/Install\ OS\ X\ Mavericks/System/Installation/Packages
cp /Volumes/OS\ X\ Install\ ESD/BaseSystem.chunklist /Volumes/Install\ OS\ X\ Mavericks
cp /Volumes/OS\ X\ Install\ ESD/BaseSystem.dmg /Volumes/Install\ OS\ X\ Mavericks
sudo bless --folder /Volumes/Install\ OS\ X\ Mavericks/System/Library/CoreServices --label Install\ OS\ X\ Mavericks
- Dettach
InstallESD.dmgandBaseSystem.dmg
hdiutil detach /Volumes/OS\ X\ Install\ ESD
hdiutil detach /Volumes/OS\ X\ Base\ System
-
Set the SMBIOS to
iMac14,2and boot OS X Mavericks installer. -
Install OS X Mavericks following normal procedure.
-
The
iMac14,2SMBIOS must be applied during the whole installation process, after the installation, you can go back toiMac15,1SMBIOS.
Install all available updates using "Mac App Store".
OS X Yosemite (10.10.5)
The preparation of OS X Yosemite installer is similar to OS X Mavericks but the installer is provided by Apple and you don't need a specific SMBIOS, iMac15,1 is supported by OS X Yosemite.
You will find below the steps on how to proceed.
References:
- Dortania's USB Creation.
- Restoring images without the futility of Disk Utility
- Alternative to
createinstallmedia
- Download OS X Yosemite Installer from Apple website.
The below method should be used to overcome the error message This copy of the Install Mac OS X can't be verified. It may have been corrupted or tampered with during download instead of the createinstallmedia tool.
-
At least an 8 GB USB drive with HFS+ file system partition and GPT partition scheme is required.
-
Extract the installer using these commands:
hdiutil attach ~/Downloads/InstallMacOSX.dmg
cd ~/Downloads
pkgutil --expand-full "/Volumes/Install OS X/InstallMacOSX.pkg" OSInstaller
- Attach
InstallESD.dmgandBaseSystem.dmg
hdiutil attach ~/Downloads/OSInstaller/InstallMacOSX.pkg/InstallESD.dmg
cp /Volumes/OS\ X\ Install\ ESD/BaseSystem.dmg ~/Downloads/OSInstaller/BaseSystem.dmg
hdiutil attach ~/Downloads/OSInstaller/BaseSystem.dmg
- Restore the attached image
BaseSystem.dmg(replace/dev/disk7s1with BaseSystem.dmg attached BSD device node, and /dev/rdisk8s11 with your USB drive BSD device node)
sudo asr restore --source /dev/disk7s1 --target /dev/rdisk8s11 --erase --noprompt --noverify
-
Rename the USB drive to
Install OS X Yosemite -
Copy the
Packagesfolder fromInstallESDto the USB drive:
rm -r /Volumes/Install\ OS\ X\ Yosemite/System/Installation/Packages
cp -rpv /Volumes/OS\ X\ Install\ ESD/Packages /Volumes/Install\ OS\ X\ Yosemite/System/Installation/Packages
cp /Volumes/OS\ X\ Install\ ESD/BaseSystem.chunklist /Volumes/Install\ OS\ X\ Yosemite
cp /Volumes/OS\ X\ Install\ ESD/BaseSystem.dmg /Volumes/Install\ OS\ X\ Yosemite
sudo bless --folder /Volumes/Install\ OS\ X\ Yosemite/System/Library/CoreServices --label Install\ OS\ X\ Yosemite
- Dettach
InstallESD.dmgandBaseSystem.dmg
hdiutil detach /Volumes/OS\ X\ Install\ ESD
hdiutil detach /Volumes/OS\ X\ Base\ System
Install OS X Yosemite following normal procedure.
If you used createinstallmedia tool to prepare the installer, you should install OS X Yosemite from Terminal using the following command:
installer -pkg /Volumes/Mac\ OS\ X\ Install\ DVD/Packages/OSInstall.mpkg -target /Volumes/Yosemite
Install all available updates using "Mac App Store".
OS X El Capitan (10.11.6)
The preparation of OS X El Capitan installer is identical to OS X Yosemite.
You will find below the steps on how to proceed.
References:
- Dortania's USB Creation.
- Restoring images without the futility of Disk Utility
- Alternative to
createinstallmedia
- Download OS X El Capitan Installer from Apple website.
The below method should be used to overcome the error message This copy of the Install Mac OS X can't be verified. It may have been corrupted or tampered with during download instead of the createinstallmedia tool.
-
At least an 8 GB USB drive with HFS+ file system partition and GPT partition scheme is required.
-
Extract the installer using these commands:
hdiutil attach ~/Downloads/InstallMacOSX.dmg
cd ~/Downloads
pkgutil --expand-full "/Volumes/Install OS X/InstallMacOSX.pkg" OSInstaller
- Attach
InstallESD.dmgandBaseSystem.dmg
hdiutil attach ~/Downloads/OSInstaller/InstallMacOSX.pkg/InstallESD.dmg
cp /Volumes/OS\ X\ Install\ ESD/BaseSystem.dmg ~/Downloads/OSInstaller/BaseSystem.dmg
hdiutil attach ~/Downloads/OSInstaller/BaseSystem.dmg
- Restore the attached image
BaseSystem.dmg(replace/dev/disk7s1with BaseSystem.dmg attached BSD device node, and /dev/rdisk8s11 with your USB drive BSD device node)
sudo asr restore --source /dev/disk7s1 --target /dev/rdisk8s11 --erase --noprompt --noverify
-
Rename the USB drive to
Install OS X El Capitan -
Copy the
Packagesfolder fromInstallESDto the USB drive:
rm -r /Volumes/Install\ OS\ X\ El\ Capitan/System/Installation/Packages
cp -rpv /Volumes/OS\ X\ Install\ ESD/Packages /Volumes/Install\ OS\ X\ El\ Capitan/System/Installation/Packages
cp /Volumes/OS\ X\ Install\ ESD/BaseSystem.chunklist /Volumes/Install\ OS\ X\ El\ Capitan
cp /Volumes/OS\ X\ Install\ ESD/BaseSystem.dmg /Volumes/Install\ OS\ X\ El\ Capitan
sudo bless --folder /Volumes/Install\ OS\ X\ El\ Capitan/System/Library/CoreServices --label Install\ OS\ X\ El\ Capitan
- Dettach
InstallESD.dmgandBaseSystem.dmg
hdiutil detach /Volumes/OS\ X\ Install\ ESD
hdiutil detach /Volumes/OS\ X\ Base\ System
Install OS X El Capitan following normal procedure.
If you've used createinstallmedia tool to prepare the installer, you should install OS X El Capitan from Terminal using the following command:
installer -pkg /Volumes/Mac\ OS\ X\ Install\ DVD/Packages/OSInstall.mpkg -target /Volumes/El\ Capitan
Install all available updates using "Mac App Store".
macOS Sierra (10.12.6)
The preparation of macOS Sierra installer is identical to OS X El Capitan.
You will find below the steps on how to proceed.
References:
- Dortania's USB Creation.
- Restoring images without the futility of Disk Utility
- Alternative to
createinstallmedia
- Download macOS Sierra Installer from Apple website.
The below method should be used to overcome the error message This copy of the Install Mac OS X can't be verified. It may have been corrupted or tampered with during download instead of the createinstallmedia tool.
-
At least an 8 GB USB drive with HFS+ file system partition and GPT partition scheme is required.
-
Extract the installer using these commands:
hdiutil attach ~/Downloads/InstallOS.dmg
cd ~/Downloads
pkgutil --expand-full "/Volumes/Install macOS/InstallOS.pkg" OSInstaller
- Attach
InstallESD.dmgandBaseSystem.dmg
hdiutil attach ~/Downloads/OSInstaller/InstallOS.pkg/InstallESD.dmg
cp /Volumes/OS\ X\ Install\ ESD/BaseSystem.dmg ~/Downloads/OSInstaller/BaseSystem.dmg
hdiutil attach ~/Downloads/OSInstaller/BaseSystem.dmg
- Restore the attached image
BaseSystem.dmg(replace/dev/disk7s1with BaseSystem.dmg attached BSD device node, and /dev/rdisk8s11 with your USB drive BSD device node)
sudo asr restore --source /dev/disk7s1 --target /dev/rdisk8s11 --erase --noprompt --noverify
-
Rename the USB drive to
Install macOS Sierra -
Copy the
Packagesfolder fromInstallESDto the USB drive:
rm -r /Volumes/Install\ macOS\ Sierra/System/Installation/Packages
cp -rpv /Volumes/OS\ X\ Install\ ESD/Packages /Volumes/Install\ macOS\ Sierra/System/Installation/Packages
cp /Volumes/OS\ X\ Install\ ESD/BaseSystem.chunklist /Volumes/Install\ macOS\ Sierra
cp /Volumes/OS\ X\ Install\ ESD/BaseSystem.dmg /Volumes/Install\ macOS\ Sierra
sudo bless --folder /Volumes/Install\ macOS\ Sierra/System/Library/CoreServices --label Install\ macOS\ Sierra
- Dettach
InstallESD.dmgandBaseSystem.dmg
hdiutil detach /Volumes/OS\ X\ Install\ ESD
hdiutil detach /Volumes/OS\ X\ Base\ System
Install macOS Sierra following normal procedure.
If you've used createinstallmedia tool to prepare the installer, you should install macOS Sierra from Terminal using the following command:
installer -pkg /Volumes/Mac\ OS\ X\ Install\ DVD/Packages/OSInstall.mpkg -target /Volumes/Sierra
Install all available updates using "Mac App Store".
macOS High Sierra (10.13.6)
Starting with macOS High Sierra, the preparation of the installer process changes and the createinstallmedia tool no longer causes installation issues. There's also a bug with APFS on High Sierra causing issues with macOS Big Sur and later, which we need to address.
You will find below the steps on how to proceed.
References:
- gibMacOS
- Create a bootable installer for macOS provided by Apple.
- Fix APFS corruption on Big Sur and later
- Rename and repair preboot
-
Download the latest version of macOS High Sierra using gibMacOS.
-
At least an 8 GB USB drive with HFS+ file system partition and GPT partition scheme is required.
-
Build the installer using the
BuildmacOSInstallApp.commandscript fromgibMacOSand choose the folder containing macOS High Sierra packages you've just downloaded. -
Move
Install macOS High Sierra.appto your/Applicationsfolder. -
Create a bootable installer for macOS High Sierra using
createinstallmediatool.
sudo /Applications/Install\ macOS\ High\ Sierra.app/Contents/Resources/createinstallmedia --volume /Volumes/MyVolume
Replace MyVolume with your USB drive name.
Install macOS High Sierra following normal procedure.
- Install all available updates using "Mac App Store".
With macOS High Sierra, Apple has introduced APFS instead of HFS+, High Sierra will cause issues with macOS Big Sur and newer volumes, as described here. To prevent this issue, follow the steps below:
-
Create partitions for macOS Big Sur and later and format them as APFS.
-
Get the UUID of each created APFS volumes using
Disk Utility. -
Type
sudo vifsin Terminal, typeiand add all UUIDs with the following syntax:
UUID="Big Sur UUID" none apfs rw,noauto
UUID="Monterey UUID" none apfs rw,noauto
UUID="Ventura UUID" none apfs rw,noauto
UUID="Sonoma UUID" none apfs rw,noauto
-
Click "Escape", then type
:wq!to save and quit the editor. -
Update the date of macOS High Sierra's
SystemVersion.plistusing the following commands:
sudo touch -t 203009110327 /System/Library/CoreServices/SystemVersion.plist
sudo touch -t 203009042358 /System/Library/CoreServices/PlatformSupport.plist
- After you install each macOS, you should add the UUID of its
Updatevolume.
macOS Mojave (10.14.6)
Preparing the installer and installing macOS Mojave is similar to macOS High Sierra. But starting with macOS Mojave, we need to apply a patch to enable GPU acceleration.
You will find below the steps on how to proceed.
References:
- gibMacOS
- Create a bootable installer for macOS provided by Apple.
-
Download the latest version of macOS Mojave using gibMacOS.
-
At least an 8 GB USB drive with HFS+ file system partition and GPT partition scheme is required.
-
Build the installer using the
BuildmacOSInstallApp.commandscript fromgibMacOSand choose the folder containing macOS Mojave packages you've just downloaded. -
Move
Install macOS Mojave.appto your/Applicationsfolder. -
Create a bootable installer for macOS Mojave using
createinstallmediatool.
sudo /Applications/Install\ macOS\ Mojave.app/Contents/Resources/createinstallmedia --volume /Volumes/MyVolume
Replace MyVolume with your USB drive name.
Install macOS Mojave following normal procedure.
- Install all available updates using "Software Update" in System Settings.
Starting with macOS Mojave, Apple has dropped support for Legacy GPUs, in particular Nvidia Tesla graphic cards, which means we will not get graphic acceleration after installation. Fortunately, dosdude1 has released a patcher for unsupported Macs. But, it is best to use the chris1111 tool (which is extracted from dosdude1 macOS Mojave Patcher) because the dosdude1 patcher installs kext and files specifically for Mac's customers, hackintosh only need GPU kexts and OpenCore does the rest of the work.
-
Download Fix Old NVIDIA macOS Mojave.
-
Install the patch (choose
macOS Mojave-10.14(5-6)). -
You should benefit from graphics acceleration after restarting your computer.
macOS Catalina (10.15.7)
Preparing the installer and installing macOS Catalina is similar to macOS Mojave. But Catalina requires AMFI to be disabled for the patch to work.
You will find below the steps on how to proceed.
References:
- gibMacOS
- Create a bootable installer for macOS provided by Apple.
-
Download the latest version of macOS Catalina using gibMacOS.
-
At least a 16 GB USB drive with HFS+ file system partition and GPT partition scheme is required.
-
Build the installer using the
BuildmacOSInstallApp.commandscript fromgibMacOSand choose the folder containing macOS Catalina packages you've just downloaded. -
Move
Install macOS Catalina.appto your/Applicationsfolder. -
Create a bootable installer for macOS Catalina using
createinstallmediatool.
sudo /Applications/Install\ macOS\ Catalina.app/Contents/Resources/createinstallmedia --volume /Volumes/MyVolume
Replace MyVolume with your USB drive name.
Install macOS Catalina following normal procedure.
- Install all available updates using "Software Update" in System Settings.
dosdude1 has released a patcher for unsupported Macs on macOS Catalina. But, it is better to use chris1111's Legacy Video Patch tool (which is extracted from dosdude1 macOS Catalina Patcher) because dosdude1's patcher installs kext and files specifically for Mac's customers, hackintosh only need GPU kexts and OpenCore does the rest of the work. dosdude1 macOS Catalina Patcher caused a crash on my computer so I had to use chris1111's tool anyway
-
Download Legacy Video Patch.
-
Now we need to add
amfi=0x80in boot-args, but if we add it inconfig.plistit will be applied to all macOS versions, we will disable it only on macOS Catalina as follows:- Get the root volume UUID with this command:
diskutil info / | grep 'Volume UUID' - Get the Preboot volume identifier using this command:
diskutil list | grep Preboot - Mount the Preboot volume:
diskutil mount disk3s4(replace "disk3s4" with your Preboot identifier) - Open
com.apple.Boot.plistfile:sudo vim /Volumes/Preboot/UUID/Library/Preferences/SystemConfiguration/com.apple.Boot.plist(replace "UUID" with your actual UUID obtained earlier) - Add
amfi=0x80to theKernel Flagsin thecom.apple.Boot.plistfile as follows:<key>Kernel Flags</key> <string>amfi=0x80</string>
- Get the root volume UUID with this command:
-
Disable Gatekeeper using
Gatekeeper.command. -
Create the patcher tool using
create_app.command. -
Install the patch.
-
You should benefit from graphics acceleration after restarting your computer.
macOS Big Sur (11.7.10)
The preparation of the installer and the installation of macOS Big Sur is similar to macOS Catalina. But starting with macOS Big Sur we will be using OpenCore Legacy Patcher to patch our GPU, which makes the operation easier than for Mojave/Catalina.
You will find below the steps on how to proceed.
References:
- gibMacOS
- Create a bootable installer for macOS provided by Apple.
- OpenCore Legacy Patcher
-
Download the latest version of macOS Big Sur using gibMacOS.
-
At least a 16 GB USB drive with HFS+ file system partition and GPT partition scheme is required.
-
Install the
InstallAssistant.pkgpackage, it will putInstall macOS Big Sur.appin your/Applicationsfolder. -
Create a bootable installer for macOS Big Sur using
createinstallmediatool.
sudo /Applications/Install\ macOS\ Big\ Sur.app/Contents/Resources/createinstallmedia --volume /Volumes/MyVolume
Replace MyVolume with your USB drive name.
Install macOS Big Sur following normal procedure.
- Install all available updates using "Software Update" in System Settings.
As with Mojave and Catalina, we need to patch the GPU in order to have graphics acceleration in macOS Big Sur, starting with this version of macOS, we will be using OpenCore Legacy Patcher, which is easier to maneuver than previous patches. We already have our EFI ready for OCLP.
-
Download the latest version of OpenCore Legacy Patcher.
-
Open the
OpenCore-Patcher.app -
Click on
Post-Install Root Patchand then click onStart Root Patching. -
You should benefit from graphics acceleration after restarting your computer.
macOS Monterey (12.7.5)
The preparation of the installer and the installation of macOS Monterey is similar to macOS Big Sur. You may need a compatible SMBIOS though, because iMac15,1 is no longer supported by Apple.
You will find below the steps on how to proceed.
References:
- gibMacOS
- Create a bootable installer for macOS provided by Apple.
- OpenCore Legacy Patcher
-
Download the latest version of macOS Monterey using gibMacOS.
-
At least a 16 GB USB drive with HFS+ file system partition and GPT partition scheme is required.
-
Install the
InstallAssistant.pkgpackage, it will putInstall macOS Monterey.appin your/Applicationsfolder. -
Create a bootable installer for macOS Monterey using
createinstallmediatool.
sudo /Applications/Install\ macOS\ Monterey.app/Contents/Resources/createinstallmedia --volume /Volumes/MyVolume
Replace MyVolume with your USB drive name.
Install macOS Monterey following normal procedure.
If the installation fails, set the SMBIOS to iMac19,1. After the installation you can go back to iMac15,1 SMBIOS.
- Install all available updates using "Software Update" in System Settings.
We need to patch the GPU to have graphics acceleration in macOS Monterey, we will use OpenCore Legacy Patcher for that.
-
Download the latest version of OpenCore Legacy Patcher.
-
Open the
OpenCore-Patcher.app -
Click on
Post-Install Root Patchand then click onStart Root Patching. -
You should benefit from graphics acceleration after restarting your computer.
macOS Ventura (13.6.7)
The preparation of the installer and the installation of macOS Ventura is similar to macOS Monterey. You may need a compatible SMBIOS though, because iMac15,1 is no longer supported by Apple.
You will find below the steps on how to proceed.
References:
- gibMacOS
- Create a bootable installer for macOS provided by Apple.
- OpenCore Legacy Patcher
-
Download the latest version of macOS Ventura using gibMacOS.
-
At least a 16 GB USB drive with HFS+ file system partition and GPT partition scheme is required.
-
Install the
InstallAssistant.pkgpackage, it will putInstall macOS Ventura.appin your/Applicationsfolder. -
Create a bootable installer for macOS Ventura using
createinstallmediatool.
sudo /Applications/Install\ macOS\ Ventura.app/Contents/Resources/createinstallmedia --volume /Volumes/MyVolume
Replace MyVolume with your USB drive name.
Install macOS Ventura following normal procedure.
If the installation fails, set the SMBIOS to iMac19,1. After the installation you can go back to iMac15,1 SMBIOS.
- Install all available updates using "Software Update" in System Settings.
We need to patch the GPU to have graphics acceleration in macOS Ventura, we will use OpenCore Legacy Patcher for that.
-
Download the latest version of OpenCore Legacy Patcher.
-
Open the
OpenCore-Patcher.app -
Click on
Post-Install Root Patchand then click onStart Root Patching. -
You should benefit from graphics acceleration after restarting your computer.
macOS Sonoma (14.5)
The preparation of the installer and the installation of macOS Sonoma is similar to macOS Ventura. You may need a compatible SMBIOS though, because iMac15,1 is no longer supported by Apple.
You will find below the steps on how to proceed.
References:
- gibMacOS
- Create a bootable installer for macOS provided by Apple.
- OpenCore Legacy Patcher
-
Download the latest version of macOS Sonoma using gibMacOS.
-
At least a 16 GB USB drive with HFS+ file system partition and GPT partition scheme is required.
-
Install the
InstallAssistant.pkgpackage, it will putInstall macOS Sonoma.appin your/Applicationsfolder. -
Create a bootable installer for macOS Sonoma using
createinstallmediatool.
sudo /Applications/Install\ macOS\ Sonoma.app/Contents/Resources/createinstallmedia --volume /Volumes/MyVolume
Replace MyVolume with your USB drive name.
Install macOS Sonoma following normal procedure.
If the installation fails, set the SMBIOS to iMac19,1. After the installation you can go back to iMac15,1 SMBIOS.
- Install all available updates using "Software Update" in System Settings.
Now we need to patch the GPU in order to have graphics acceleration in macOS Sonoma, we will use OpenCore Legacy Patcher for that.
-
Download the latest version of OpenCore Legacy Patcher.
-
Open the
OpenCore-Patcher.app -
Click on
Post-Install Root Patchand then click onStart Root Patching. -
You should benefit from graphics acceleration after restarting your computer.
This project took me exactly one month, between searching for the perfect GPU, testing on candidate computers (Kenstfield & Haswell-E), and fine-tuning the designated computer (Haswell). I built this project just to have fun and take on a new challenge in the hackintosh world. I was lucky enough to have the right hardware for this project (except for the graphics card, which I had to buy). I wouldn't recommend this project to those who have no patience and can't afford to damage anything, in fact, I damaged my oldest Hackintosh (from the Leopard era) while installing a GPU and Bluetooth functionality on my T919 from my daily Hackintosh HP Z640.
Finally, when I finished this project and succeeded, I was very happy with the result and I don't regret the damage I did, nor the time I spent on it.